
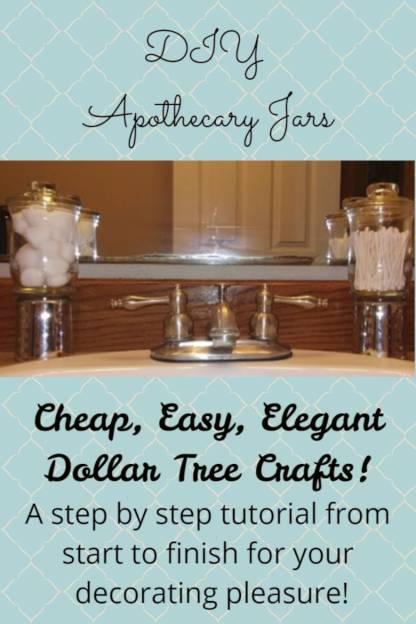
Apothecary Jars: DIY Designer Decor Dollar Tree Craft
DIY Apothecary Jars Bathroom Decor! Having set out on a mission to make affordable jars, here’s a super cheap but expensive looking results!
If you are looking for a cheap and easy way to decorate your bathroom for Thanksgiving you can check that link out! We’ve also got a great list of inexpensive ways to transform any room and you can see how we transformed our bathroom cabinets completely for less than $120 (price may have changed by now).
I wanted to revamp my master bathroom and honestly didn’t want to spend an arm and a leg. Walking through my favorite home décor stores I realized that some of the things I saw could be made easily and could be personalized to better match my bathroom.
I decided on making my own apothecary jars using supplies I had around the house and a few things that I found at the local dollar store.
The end result was exactly what I wanted, and it really only took a few minutes to achieve the look I was going for. The best part of the project is that it can be changed up so easily to fit different styles or themes.
How To MakeApothecary Jars
Supplies:
- A pair of strong scissors
- Heavy duty glue E600 (I used gorilla glue for glass)
- Two candle holders
- Two jars
- And two lids
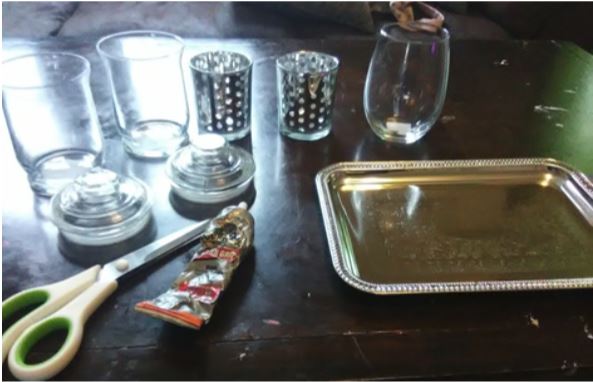
*the extra jar and silver tray are pictured because I thought about implementing them then decided against it later*
Making Our Apothecary Jars
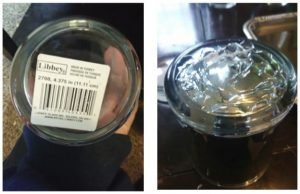
First you will need to remove the rubber ring from the lids. This is super easy to do, using the scissors, slide the rubber ring off by putting the blade in between the rubber and the glass and wiggling the blade. The rubber ring will easily just pop off. You can also cut the ring, I decided not to just in case I wanted to reuse it for something.

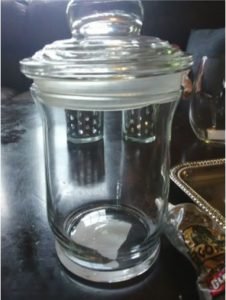
Now you could leave the rubber ring if you want, however (depending on the jar you have) the lid will not sit the way I wanted it to with the rubber on it. To the right is what it looked like with the rubber ring still on the lid.
Next you will need to remove any sticker labels from the jar and candle holders. *use some glass cleaner to get any sticky residue that is left over* after the sticker is removed, apply the heavy duty glue to the bottom of your candle holder.
 This next part can be a bit tricky so make sure to use extra care. Line up the bottoms of your candle holder to the bottoms of your jars so that it will be centered. Once the two are cantered place together firmly. The heavy duty glue takes a few minuets to start creating a firm hold, so I used a few drops of hot glue as well just so I didn’t have to hold it for more than a few seconds. (sorry I didn’t get a picture of that)
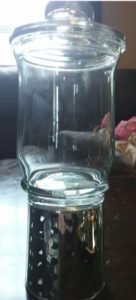
Now all you have to do is wait for the heavy duty glue to dry and you are all done! The candle holder I used as the base for my apothecary jar has a mirror finish to it with some polka-dot pattern. I chose this one because I want to add some led tea lights under it for extra flare. So like I said this look can be very much customized to fit anyone’s taste. Here is the finished look in the bathroom. I just love how it glammed up my simple master bath!

I am not a crafty person but this is pretty simple. They are very cute!
I thought I left a comment here before, but I don’t see it…oh well. I used to make “girly” stuff – bath bombs, bath salts, soaps…packaging is important. Apothecary jars were perfect, but pricey. I wish I’d known about this back then. But it’s never too late!
You had, because of spammers I had to set it up so that I manually approve every comment. Otherwise, they were constantly posting inappropriate, non-family friendly things.
Oh, I love apothecary jars! I used to make bath bombs, soaps, bath salts, etc. They looked SO nice in apothecary jars, and made such a nice gift.
I love this idea!! Im not the craftys person but this is too cute!
Hi Kaycee, very nicely done. I love apothecary jars and they can be expensive sometimes. This is a great way to have them on a budget. Thanks for sharing and for co-hosting #omhgww
Thanks! All the credit goes to my crafty friend Dawn though. She’s got some serious talent!
These jars are so pretty, what a great way to decorate your home! They seem really easy to make too, thank you so much for sharing!
This would be a fun craft for girls to do! thanks for sharing!
I love old glass jars like this. You can use them in so many ways. I like putting multi-colored marbles or even wound up ‘fairy lights’ in them.
This is such a cute idea. I will have to try this soon. Thank you so much for sharing