×
Our website is made possible by displaying online advertisements to our visitors. Please consider supporting us by whitelisting our website.
Holiday Specialties

Romantic Roses: How to make Picturesque Cake Pop Bouquets

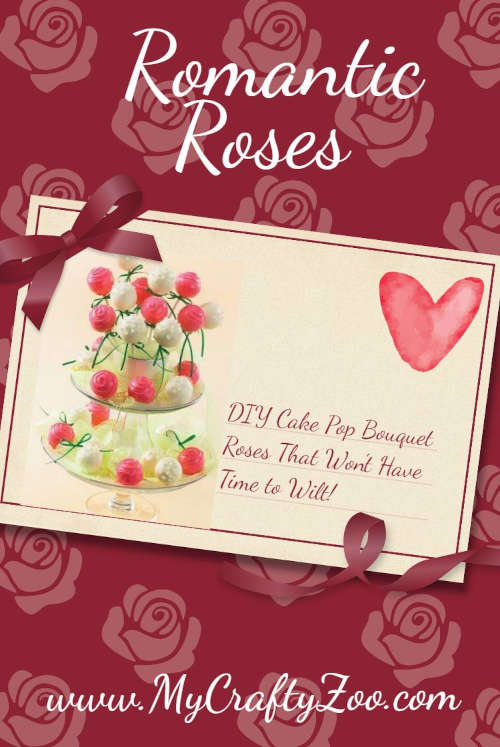
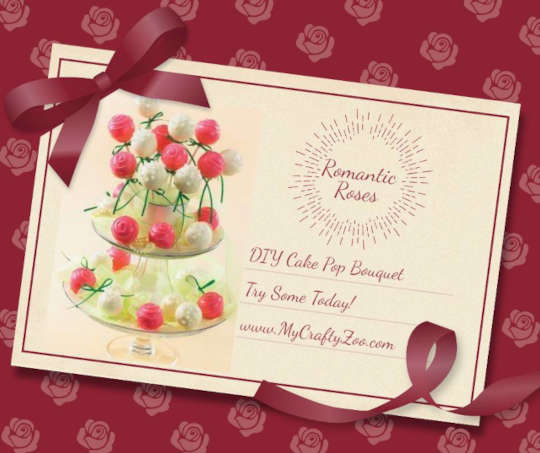
Romantic Roses Cake pops Bouquets can are a work of art and these beautiful Romantic Roses are absolutely stunning!  Check out this awesome tutorial to make your own.

DIY Romantic Roses Cake Pops Recipe

Aren’t these beautiful!  The sky is the limit with what you could do with them and I just love them!  Flowers my husband would appreciate!  LOL.  These and other adorable recipes can be found in the book 175 Best Babycakes Recipes by Kathy Moore and Roxanne Wyss.  You can check out my Baby Cakes Review and get your copy here.

These days, BabyCake Cake Pop Makers are super cheap compared to when they first came out and they come in fun colors. They also have great ratings on molds that do Round Cake Pops, Star Cake Pops and Heart Cake Pops as an alternative to the maker. Romantic Roses: How to make Picturesque Cake Pop Bouquets
Cake Pop Romantic Roses ‘Bouquet’ Instructions

Makes 1 centerpiece

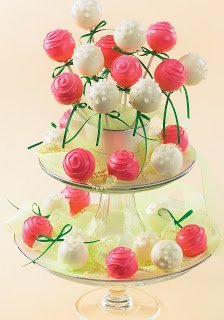
Create this show-stopping tiered arrangement of cake pop roses for a romantic Valentine surprise, sophisticated garden fête, a tea party for a special grandmother or anytime you want to set the stage for a stylish occasion.

Ingredients

           Pink and white candy melts
           20 to 24  Princess Cake Pops
           White sugar pearls

Materials

12        cake pop sticks
1          pastry bag or squeeze bottle, fitted with a fine tip
2          glass candlesticks (about 4 inches/10 cm tall)
1          china dinner plate
1          china soup bowl or salad plate
1          china sugar bowl or cup
            Light green tulle
            Styrofoam block (at least 3 inches/7.5 cm cubed)
12 feet green ribbon (1⁄8 to 1⁄4 inch/3 to 360 cm 5 mm wide)
            Pearl strings
1.  Romantic Roses: How to make Picturesque Cake Pop Bouquets @Crafty_ZooMelt 1⁄4 cup pink candy melts (see page 18) and use to attach sticks to 6 cake pops (see page 27). Freeze cake pops for at least 15 minutes to set. Reserve the remaining candy melts. Repeat with white candy melts, attaching sticks to 6 cake pops (8 to 12 cake pops will not have sticks).
2.  Add 1 cup pink candy melts to those left in the cup and melt until smooth. Coat the cake pops secured with pink candy melts. Set in a cake pop stand to dry. Using the fork tool, dip half of the cake pops without sticks and place them on a wire rack set over a sheet of foil or waxed paper to dry.
3.  Add 1 cup white candy melts to those left in the cup and melt until smooth. Coat the cake pops secured with white candy melts and immediately sprinkle with sugar pearls. Set in the stand to dry. Using the fork took, dip the remaining cake pops without sticks and place them on the rack to dry.
4.  Reheat pink candy melts, adding more as needed. Use the pastry bag to pipe a swirl in a tight circle on top of each pink cake pop (with and without sticks) to resemble a rose bud. Set cake pops with sticks in the stand to dry. Set cake pops without sticks on the rack to dry.
5.  Use craft glue to glue one candlestick to the bottom of the dinner plate to form a large pedestal. Glue the other candlestick to the bottom of the soup bowl to form a smaller pedestal. Let both dry.
6.   Place the small pedestal on top of the large pedestal. Place the sugar bowl on top of the small pedestal. If necessary for stability, glue everything together. Decoratively arrange tulle over the bottom two pedestal layers.
7.   Measure the dimensions of the sugar bowl and trim the Styrofoam to fit snugly and be about 1 inch shorter than the bowl. Place Styrofoam in the bowl.
8.   Cut ribbon into twelve 7-inch lengths (there will be ribbon left over). Tie a bow around each cake pop stick. Slide bows up to just below cake pops. Push the cake pop sticks into the Styrofoam, arranging the roses at different heights. Fill in around cake pops with small pieces of tulle, hiding the Styrofoam.
9.   Arrange the cake pops without sticks in the tulle on the middle and bottom layers. Cut the remaining ribbon into 8-inch lengths and tie small bows with long tails. Arrange the bows next to the cake pops so that the ribbon flows off the plates. Drape pearl strings around the cake pops on the bottom two layers.

Tips For Your Bouquet of Roses

  • It looks especially dramatic to place just one cake pop without a stick on one side of the middle layer, positioned beside a bow with especially long tails.
  • Inexpensive glass candlesticks and individual pieces of china can often be found at thrift stores, yard sales, flea markets and estate sales. Even mismatched pieces can combine for an attractive look.
  • You can substitute tiered glass cake pedestals in graduated sizes for the china and candlesticks.
  • To complement this centerpiece, fill matching teacups with additional cake pops on sticks, decorated to match the large arrangement, and set the teacups around the room. Make enough cake pops so that each guest can eat one at the party and take one home as a favor.
  • Capture the days of wine and roses. For a beautiful evening, begin with a Romantic Roses centerpiece, then serve a bottle of Champagne, Prosecco or your favorite wine in your best wineglasses. Pure romance.
Excerpted shared with permission from 175 Best Babycakes Cake Pop Maker Recipes by Kathy Moore & Roxanne Wyss © 2012 www.robertrose.ca Reprinted with permission. All rights reserved.
You can also check out these fantastic recipes from the same book:

DIY Easy Halloween Cake PopsThai Crab Bites Wasabi Mayo Recipe

Kaycee

Hi all! My name is Kaycee. I am now learning to navigate life as a single woman. Turns out, it's not all about husband and children. Who knew? So, I'm on a journey of self discovery. I have 5 children, 3 of which are married, 5 2 are in Heaven (my beautiful baby Acadia Reign and my Diva Princess Tara Elizabeth), and 7 grandchildren! Plus, a ton of fabulous nieces and nephews! My educational background is in Psychology and Child Development but my heart is in ministry, crafts, fun, reviews and my website, My Crafty Zoo. Or at least it was, now I'm learning who I really am, beneath all of the busy family life. It's an adventure to be sure. I look forward to continuing to share my life through word and pictures with you and love hearing your feedback! Thank you for taking the time to read and allowing me to share! I look forward to reading your comments!

4 thoughts on “Romantic Roses: How to make Picturesque Cake Pop Bouquets

Leave a Reply

Your email address will not be published. Required fields are marked *